
Aircraft tab
Your aircraft, from its POH
The figures and charts in your aircraft's Pilot's Operating Handbook are what the app works from. You put them in once, every plan uses them, and you check each result against the book.
Planning aids. Check against your POH and the AIP. You remain responsible for the flight.
From the weight and balance section
The loading figures
Each aircraft profile starts with the numbers from your POH's weight and balance section and the aircraft's weighing record.
What it does
- Maximum take-off weight, and the maximum landing weight if your POH gives one.
- Basic empty weight and its arm.
- Arms for the pilot and front passenger, the rear seats, the fuel and the baggage.
- Extra arms of your own, for anything else you load, and for more than one fuel tank.
- The cruise TAS and fuel rate, which each new flight plan uses for its legs.
- Imperial or metric units. The envelope's points convert when you change.
How it works
Step by step: a new aircraft
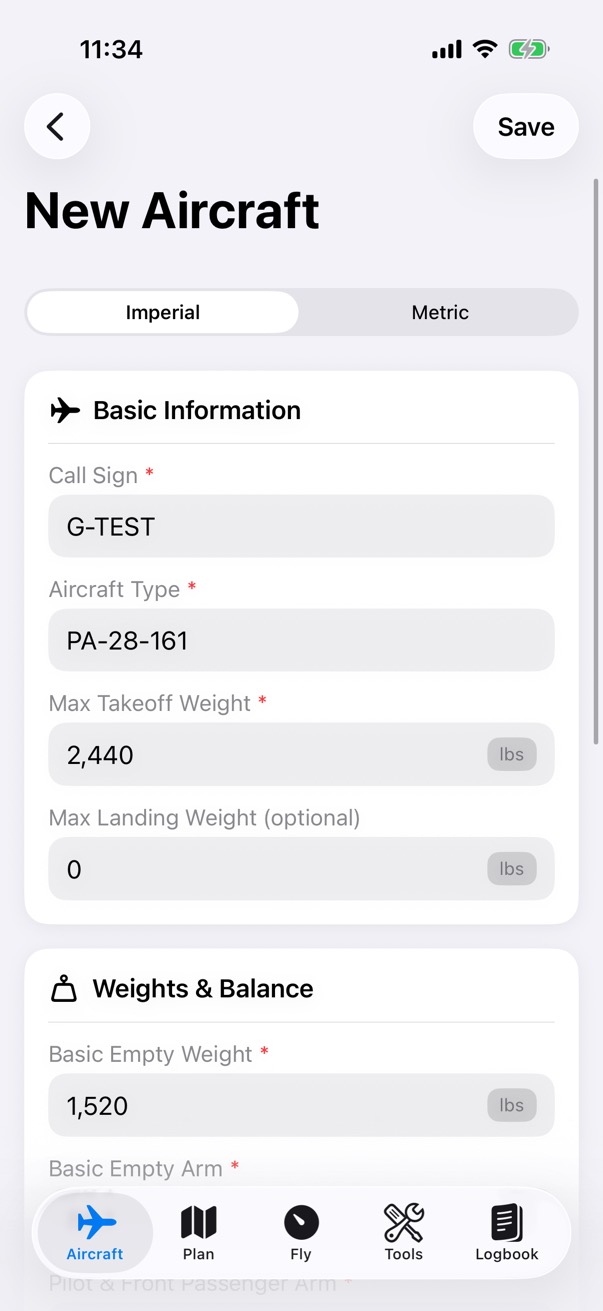
Step 1 of 3
Add Profile
In the Aircraft tab, tap Add Profile. Enter the call sign, type, weights and arms, and the cruise TAS and fuel rate, then tap Save.
How it works. Each arm is a distance from the datum your POH sets. Weight times arm gives each item's moment.
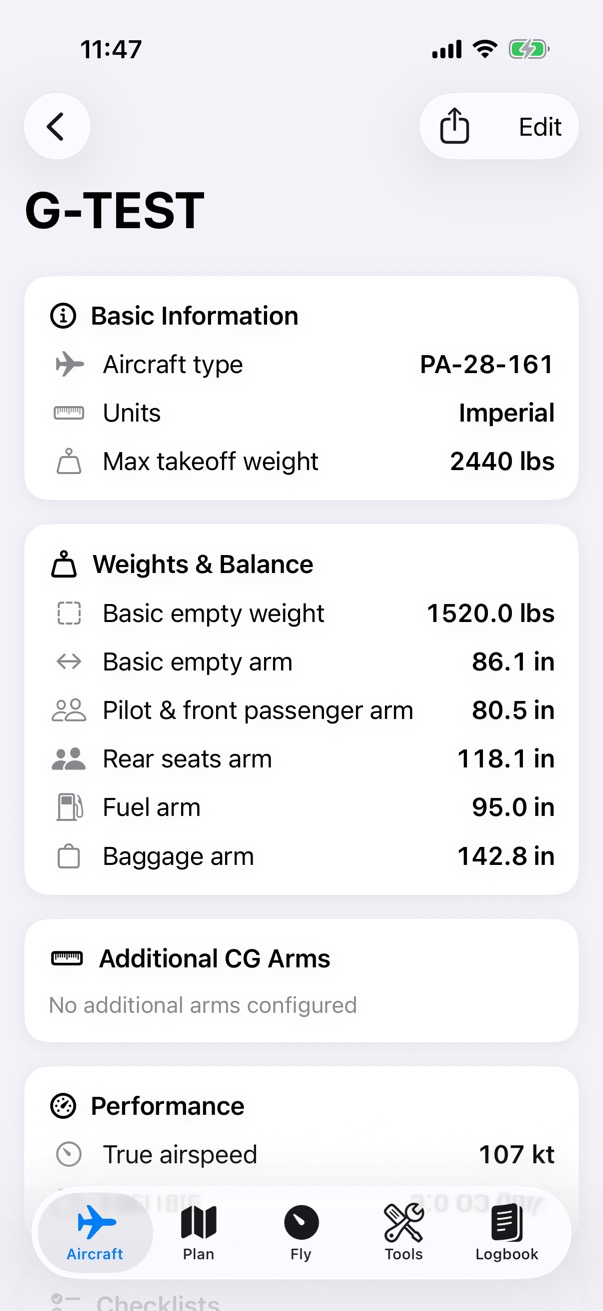
Step 2 of 3
The profile
The profile keeps everything the plans use: the weights, the arms and the cruise figures.
How it works. New flight plans take the cruise TAS and fuel rate from here for their legs, and you can change them on any leg.
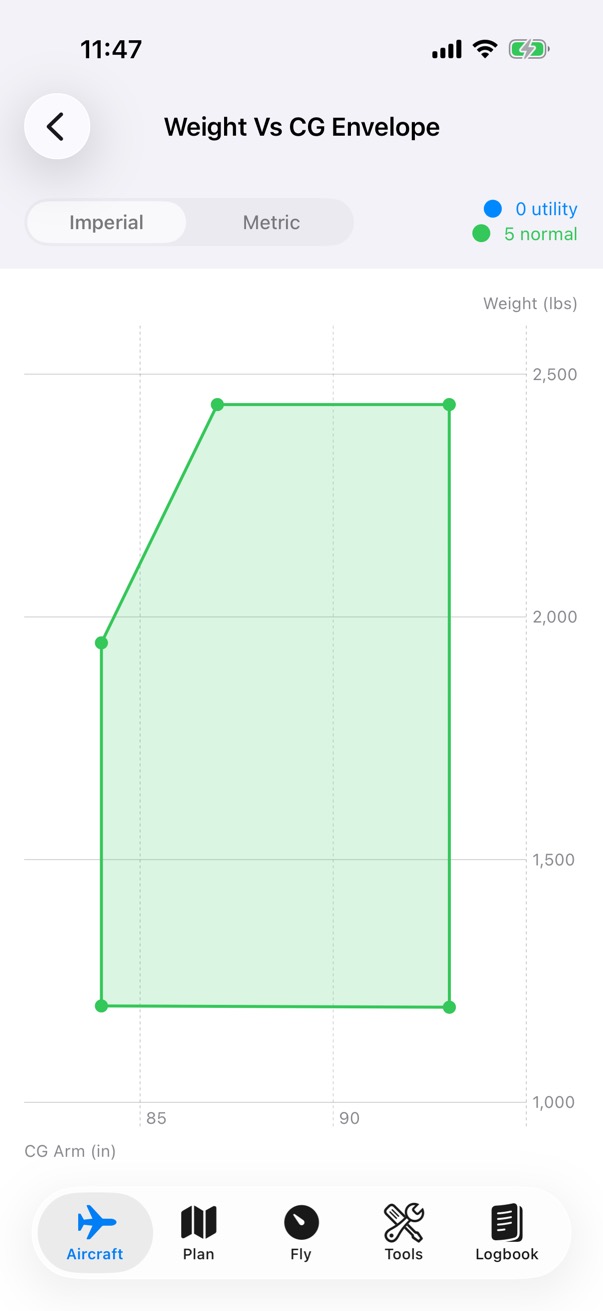
Step 3 of 3
The envelope
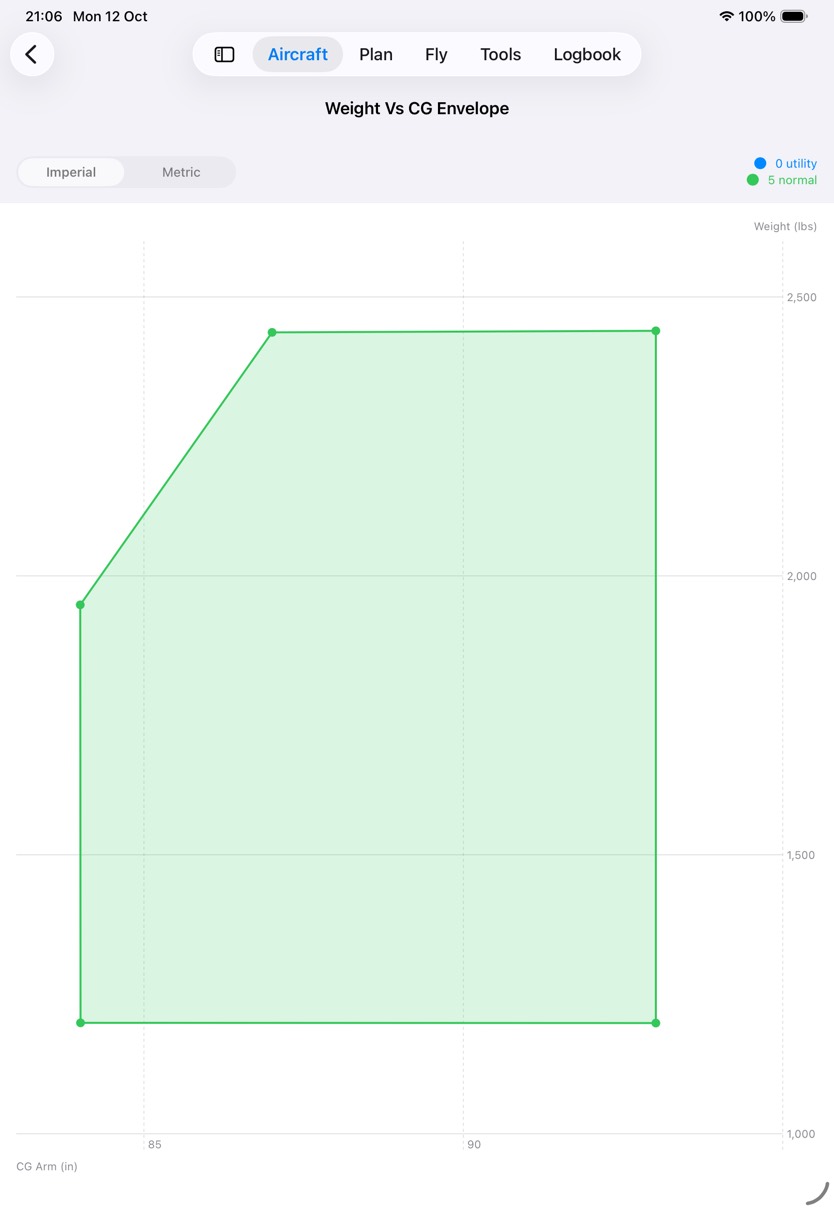
Open the profile and tap Edit, then Edit Envelope. Tap the chart to place the CG envelope's points, or tap Scan Chart to read them from a photo of your POH.
How it works. The envelope is weight against CG arm, for the normal and utility categories. Every Weight & Balance is checked against it.
From the CG envelope chart
The CG envelope, from a photo of the chart
Rather than typing every corner of the envelope, take a picture of the chart. The app works through seven steps with you, and all of the analysis happens on your device.
What it does
- Scan the chart with the camera, choose a photo, or pick a page from a PDF of your POH.
- The app reads the printed axis numbers, traces the envelope and suggests its points.
- You adjust and review the points, then save.
- You can also place the points yourself: tap the chart in the envelope editor, or edit a point to type its weight and arm.
How it works
Step by step: the seven steps
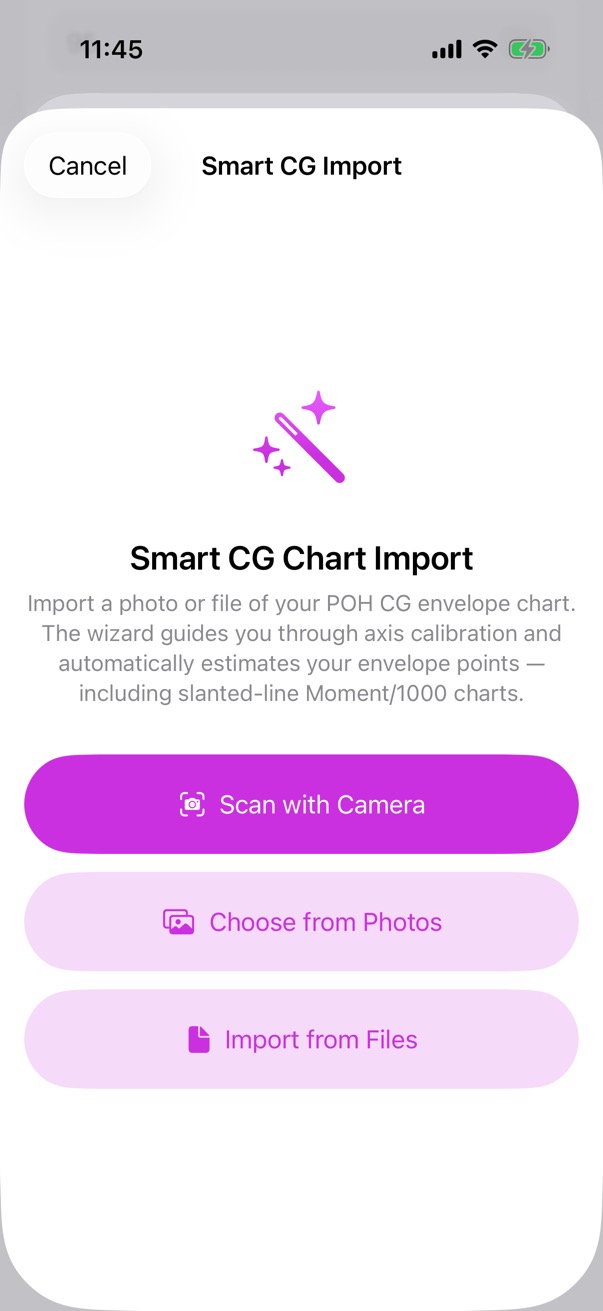
Step 1 of 7
Choose the chart
Scan it with the camera, choose a photo, or pick a page from a PDF of your POH.
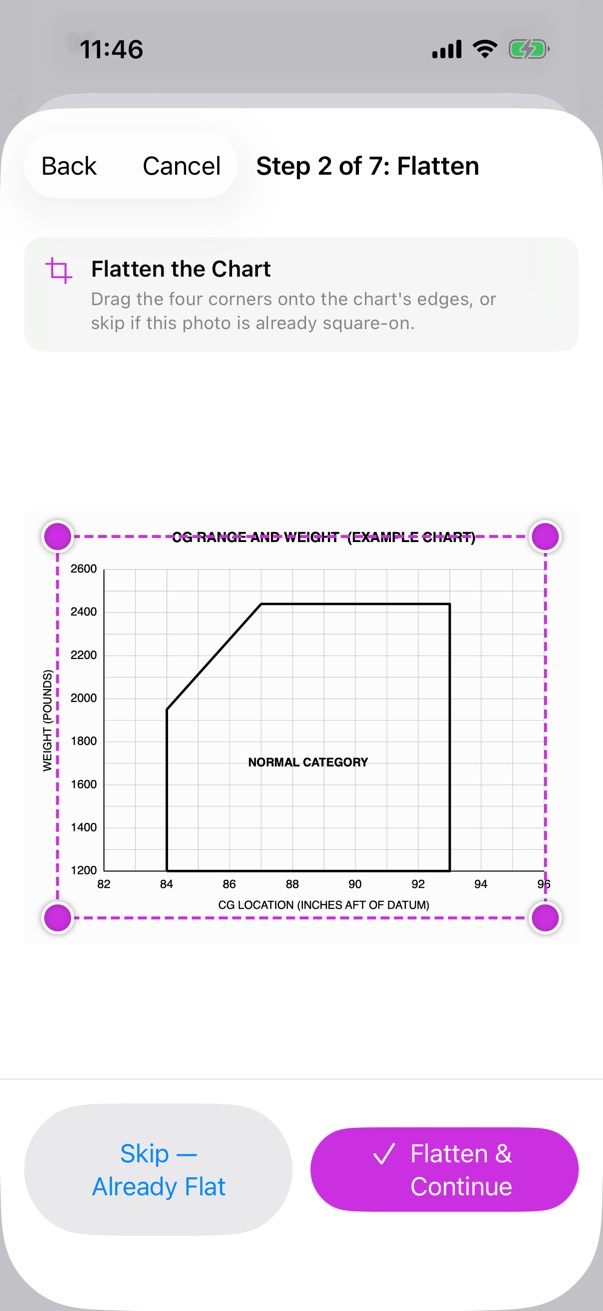
Step 2 of 7
Flatten
Drag four corners onto the chart's edges to square up a photo taken at an angle, or skip this if it's already square-on.
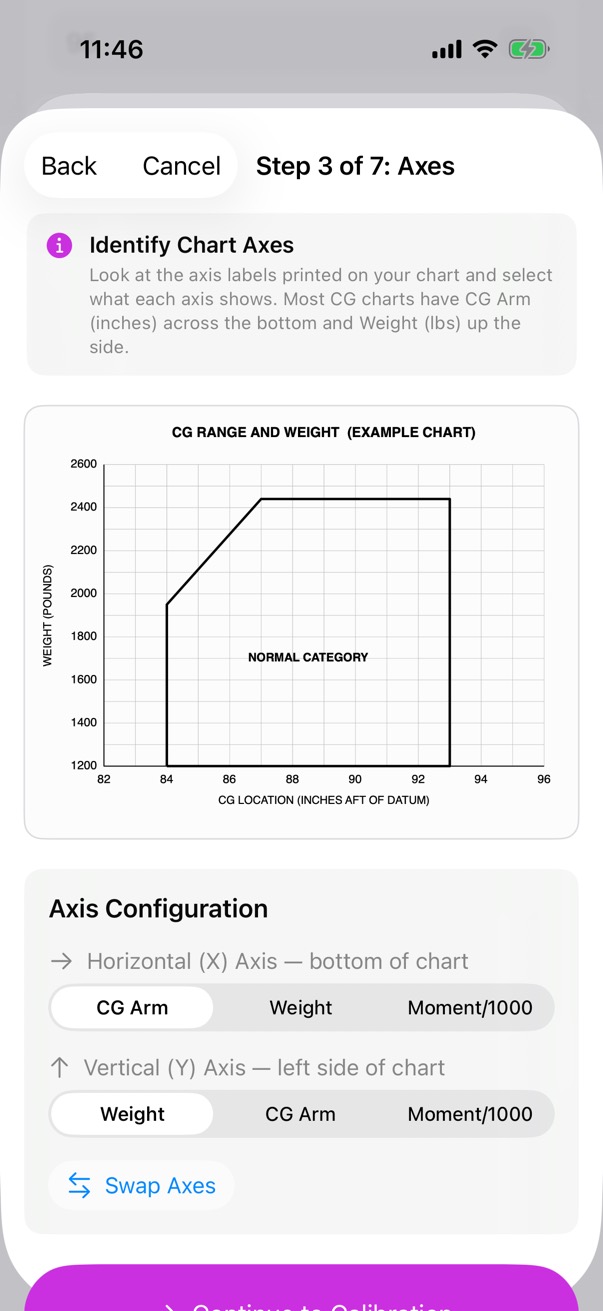
Step 3 of 7
Axes
Say what each axis shows: CG arm, weight, or moment/1000.
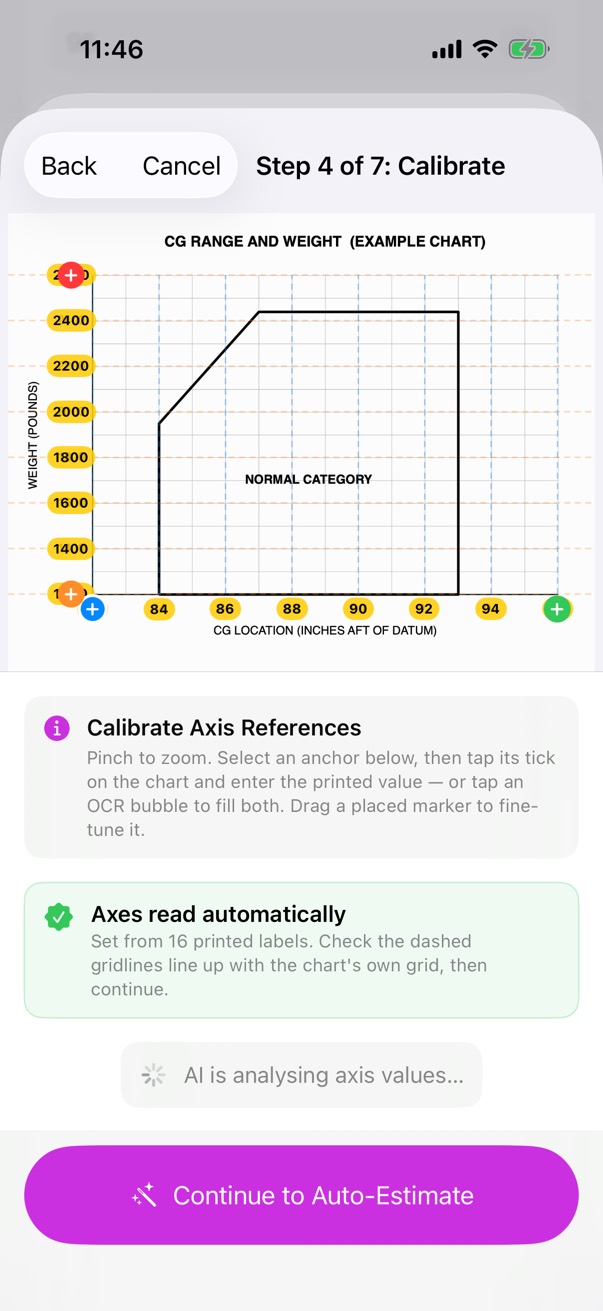
Step 4 of 7
Calibrate
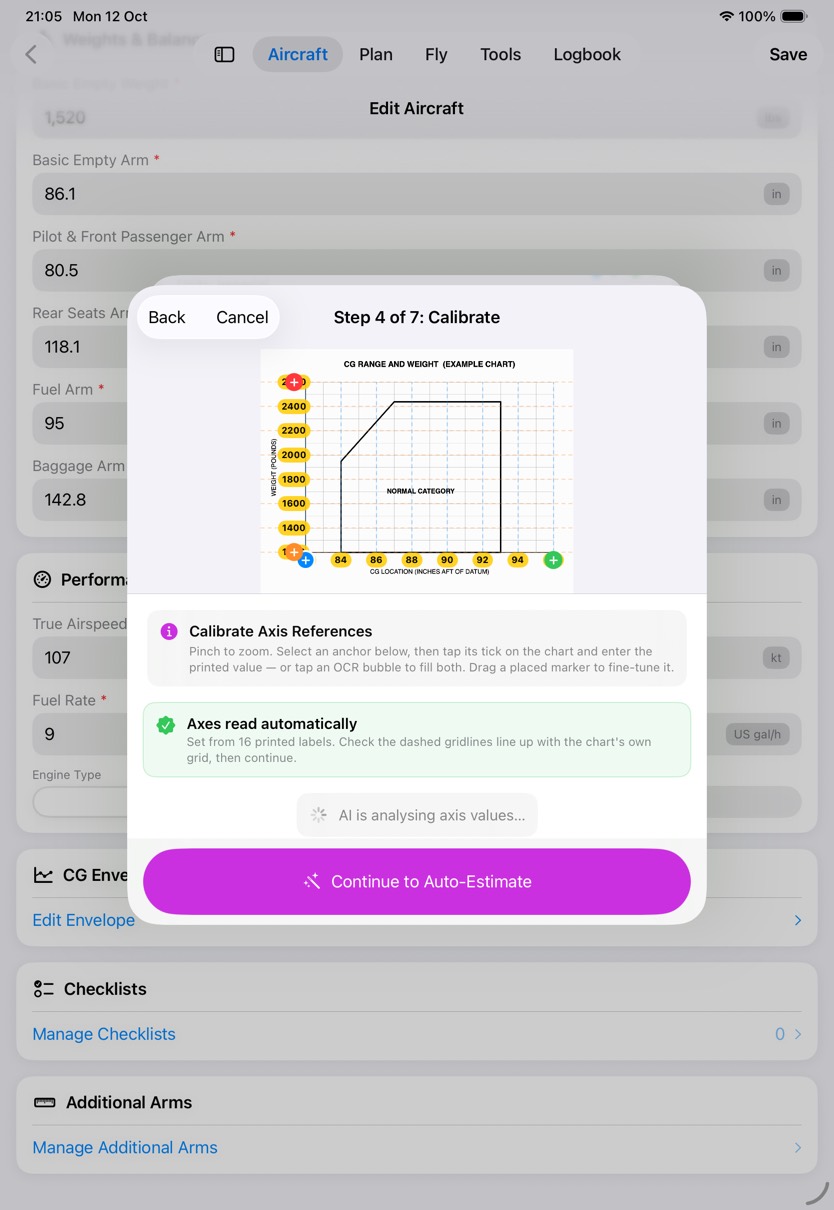
The app reads the printed axis numbers and lines its grid up with the chart's. Check the gridlines match, or tap the ticks yourself.
How it works. On-device text recognition reads the numbers, 16 of them on this example chart. Charts whose CG lines fan out are handled too.
Step 5 of 7
Estimate
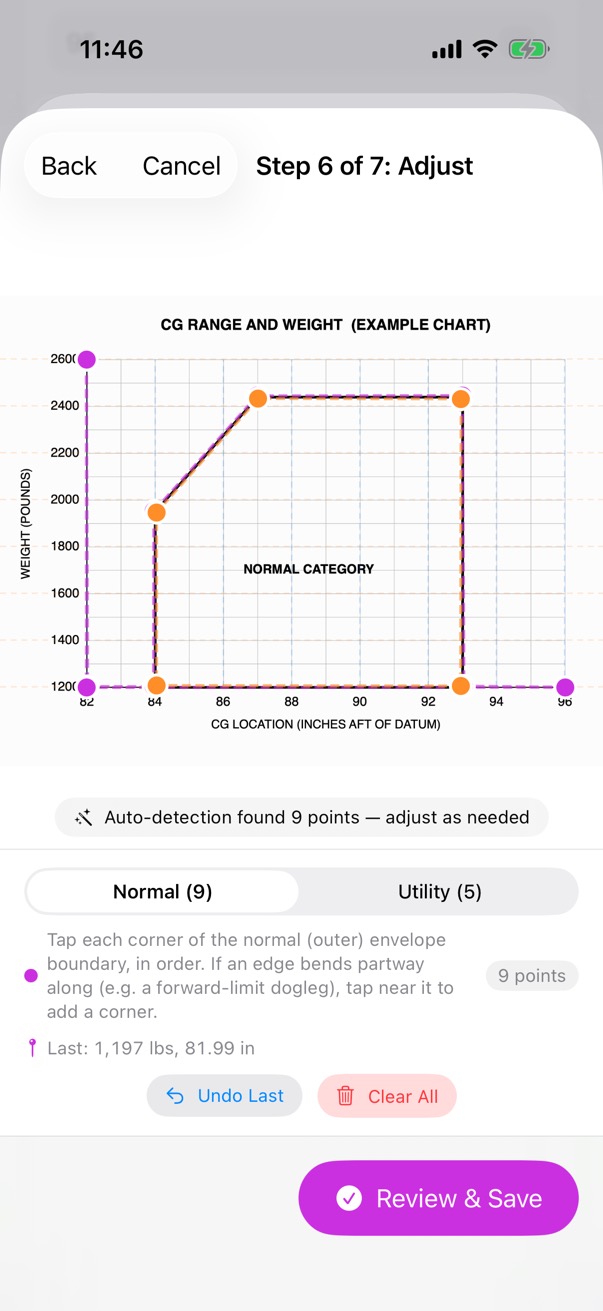
Edge detection traces the envelope and suggests its points.
How it works. The suggestion is a starting point: here it found 9 points along the outline.
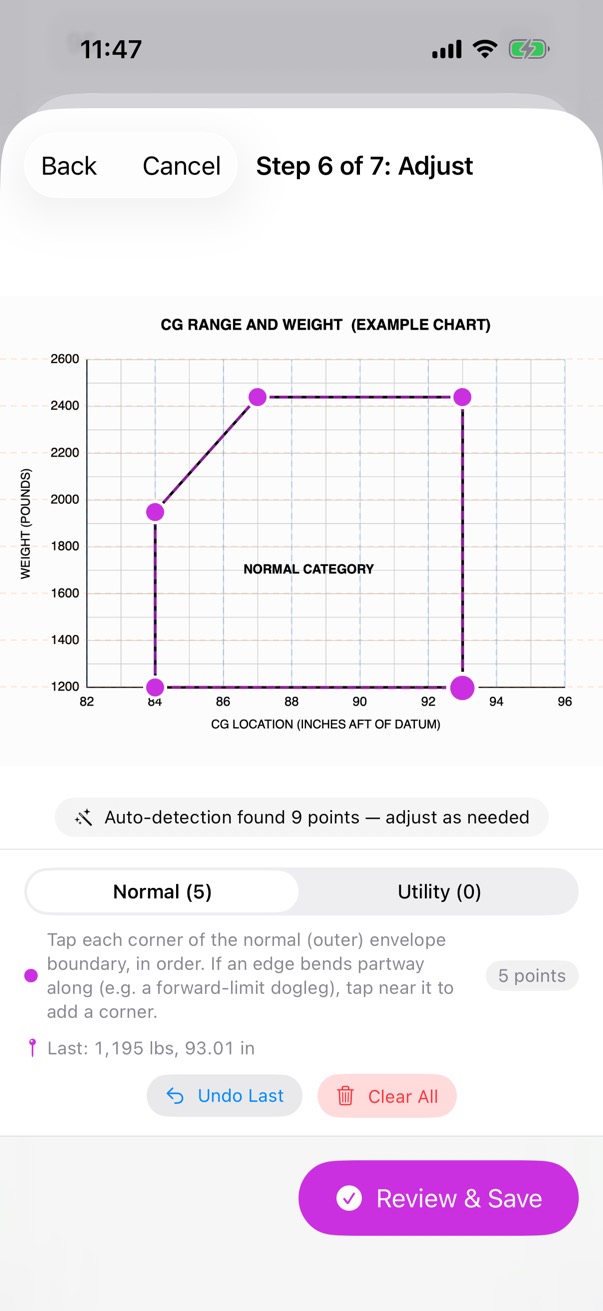
Step 6 of 7
Adjust
Tap each corner of the normal and utility envelopes in order, or keep the suggested points.
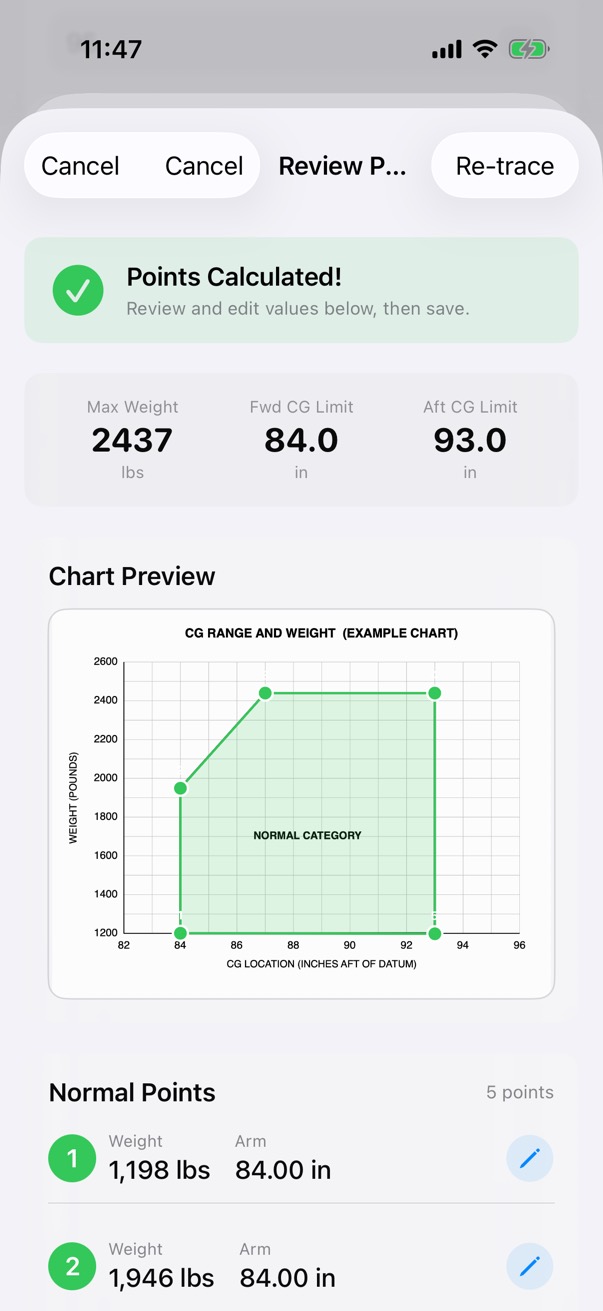
Step 7 of 7
Review
See the maximum weight and the forward and aft CG limits, edit any point, then save the envelope to the aircraft.
From the performance section
Performance charts
Import the take-off, landing, climb and cruise charts from your POH. You trace each one step by step, the way you would with a ruler and a pencil, and read the answer yourself.
What it does
- Take-off distance, landing distance, rate of climb, climb speed and cruise performance, or a type of your own.
- Mark out a chart's sections once. Every trace then steps through them in order.
- The app doesn't read numbers off the chart: you read the answer from the last section.
- Each flight plan traces the charts again for the day's conditions.
How it works
Step by step: a performance chart
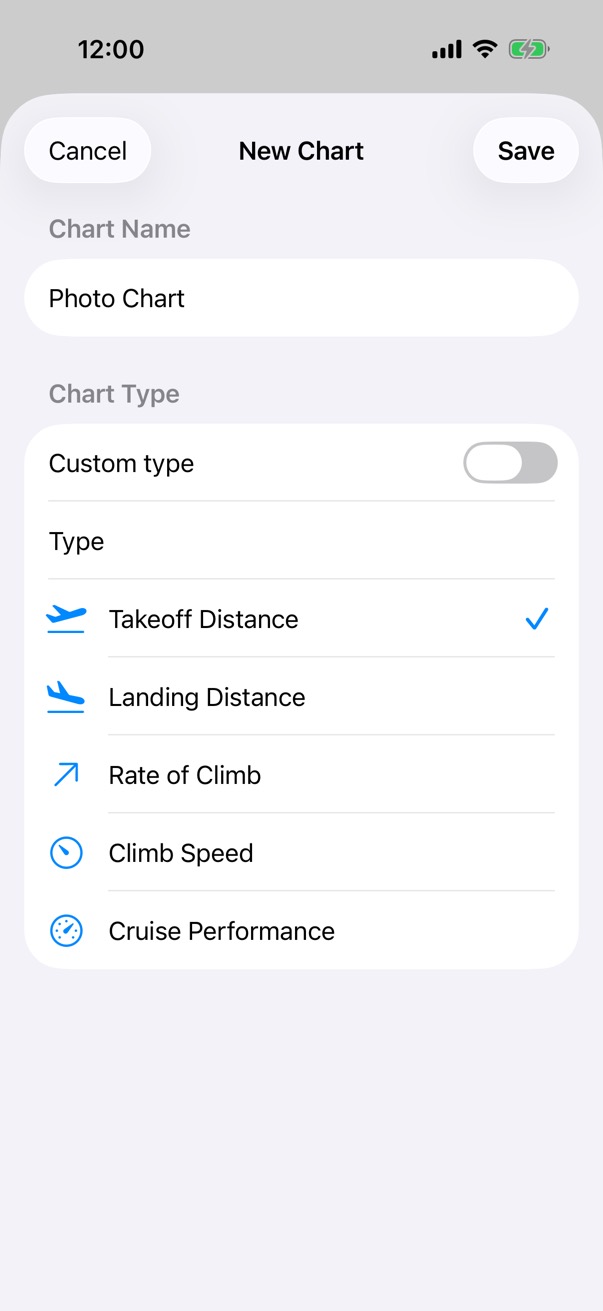
Step 1 of 7
Import a page
From a photo, or a page of your POH as a PDF. Name the chart and choose its type.
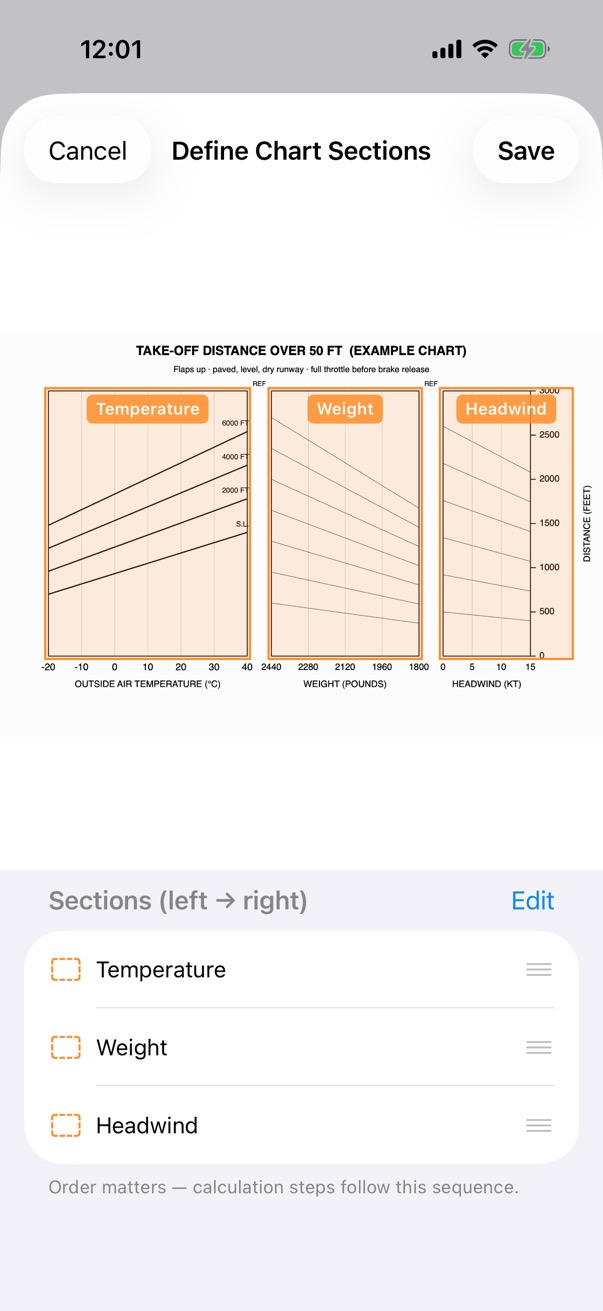
Step 2 of 7
Mark out its sections
Drag across the chart to mark each part of it, left to right, such as temperature, weight and wind.
How it works. The order sets the steps of each calculation.
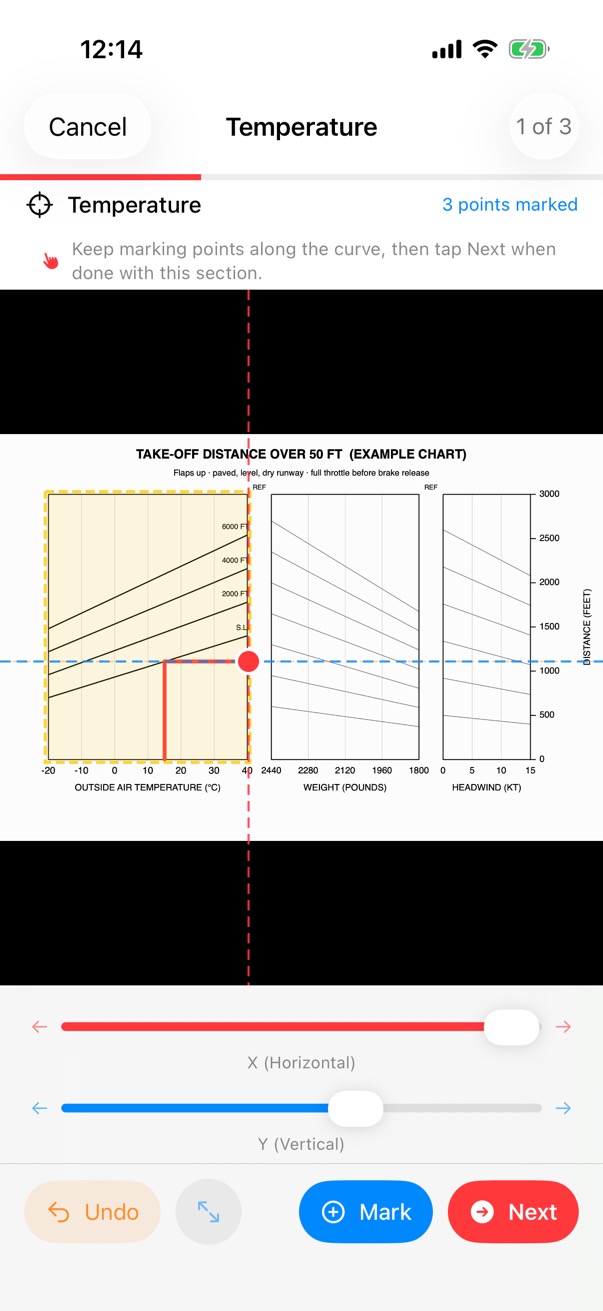
Step 3 of 7
Trace the first section
Step through the sections, placing points with crosshair guides you can drag or set with sliders.
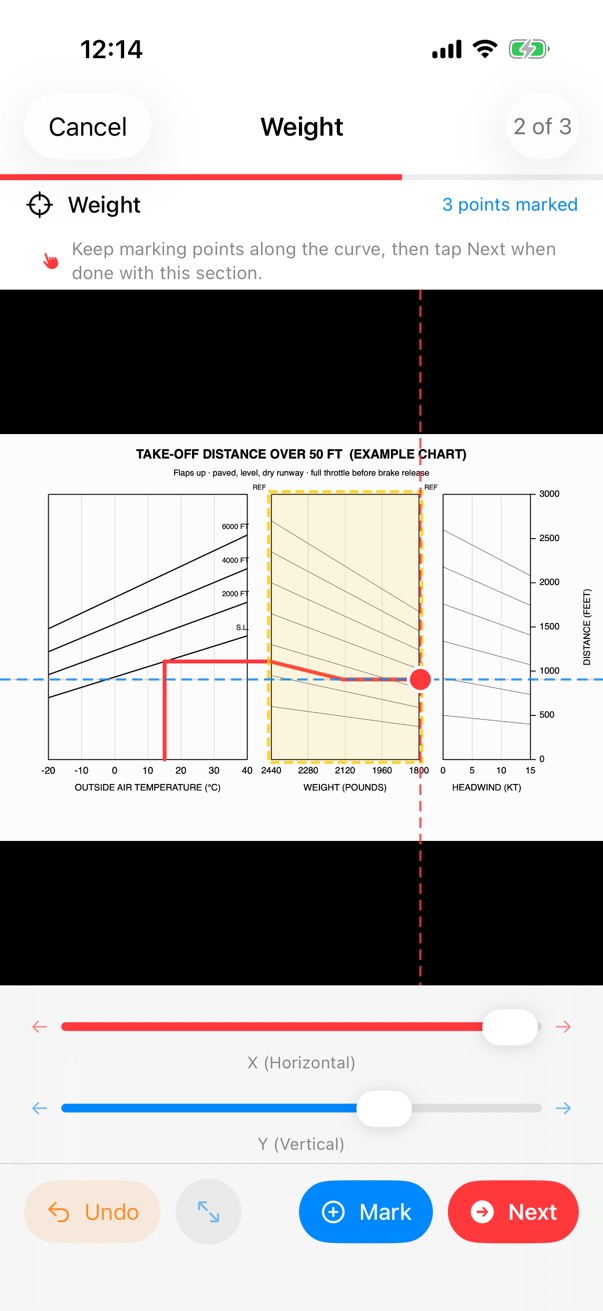
Step 4 of 7
Follow the guides
Mark points along the guide lines in each section. The path you draw shows in red across the chart.
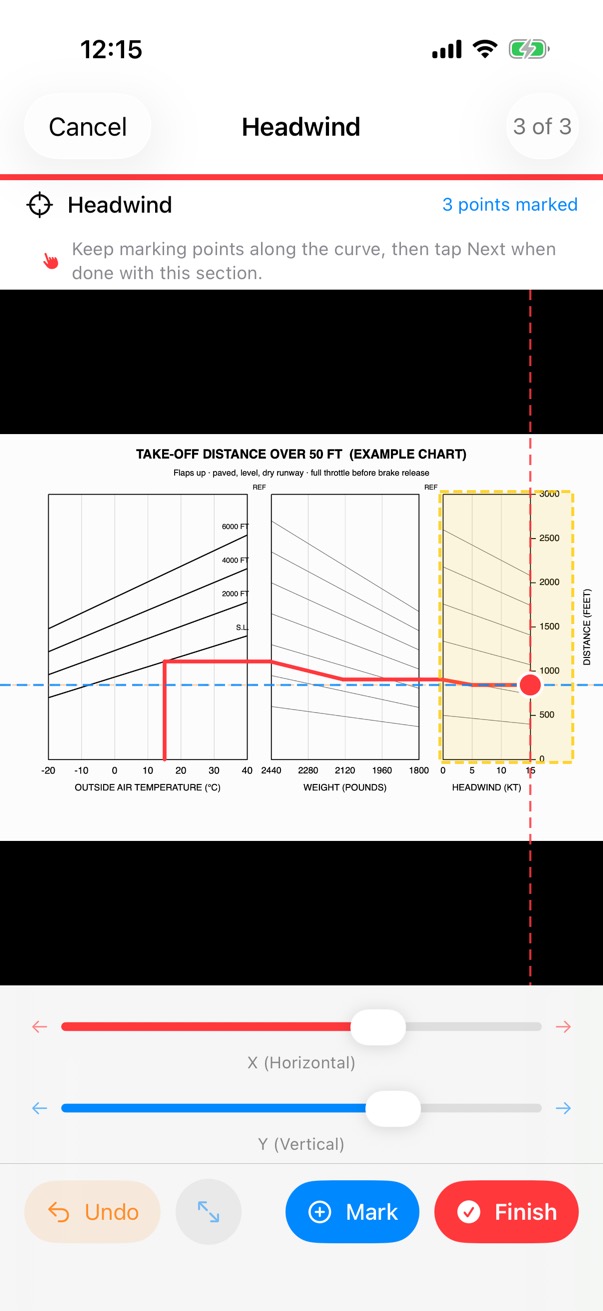
Step 5 of 7
The last section
The last section takes the path out to the distance scale.
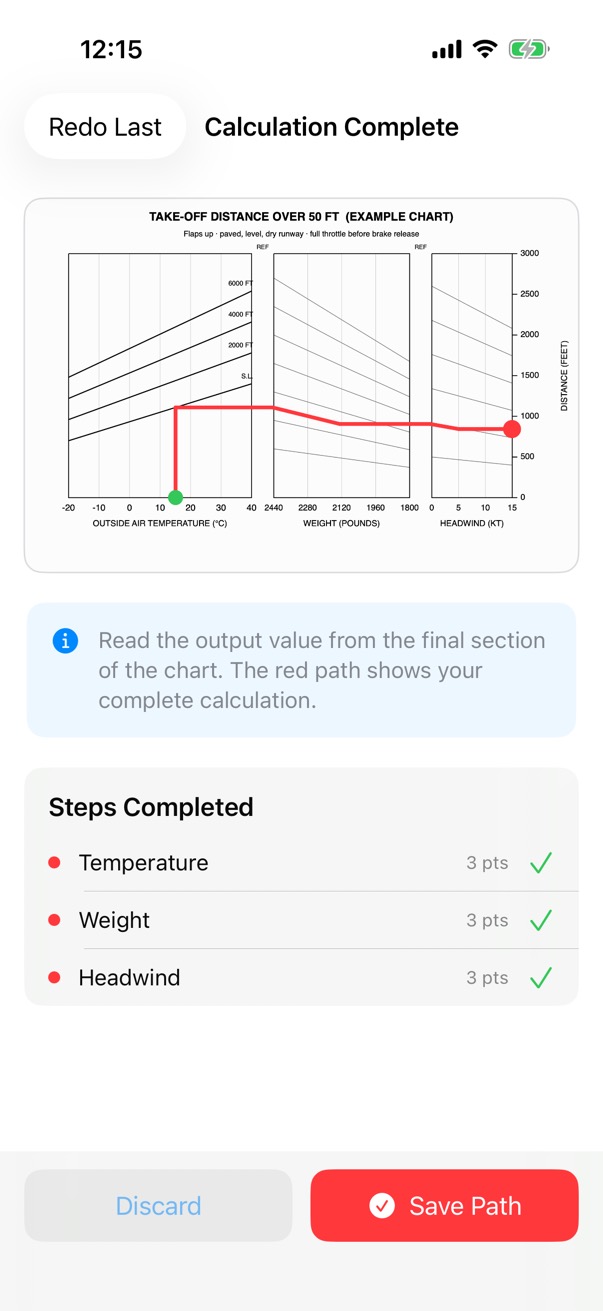
Step 6 of 7
Read the result
You read the answer from the last section yourself, and you can save the trace to compare with later ones.
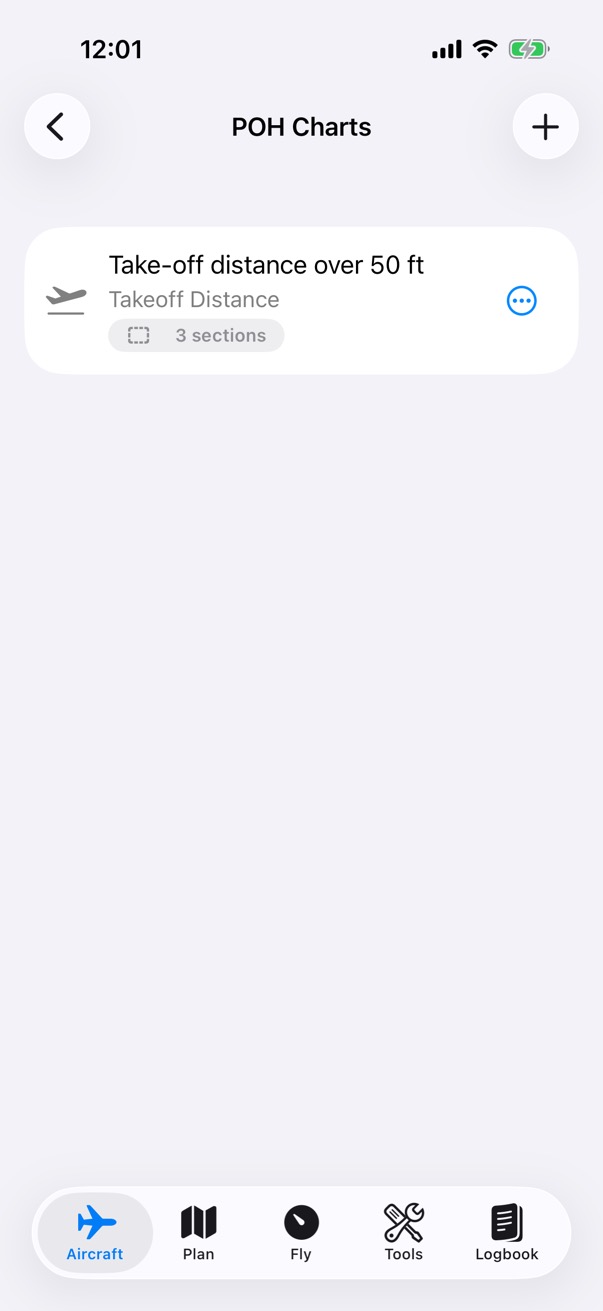
Step 7 of 7
Kept with the aircraft
The chart and its sections are saved to the aircraft, ready for each flight plan.
From the normal procedures
Checklists
Type in your POH's checklists once, and keep them with the aircraft.
What it does
- As many checklists as you need for each aircraft, each with its items in order.
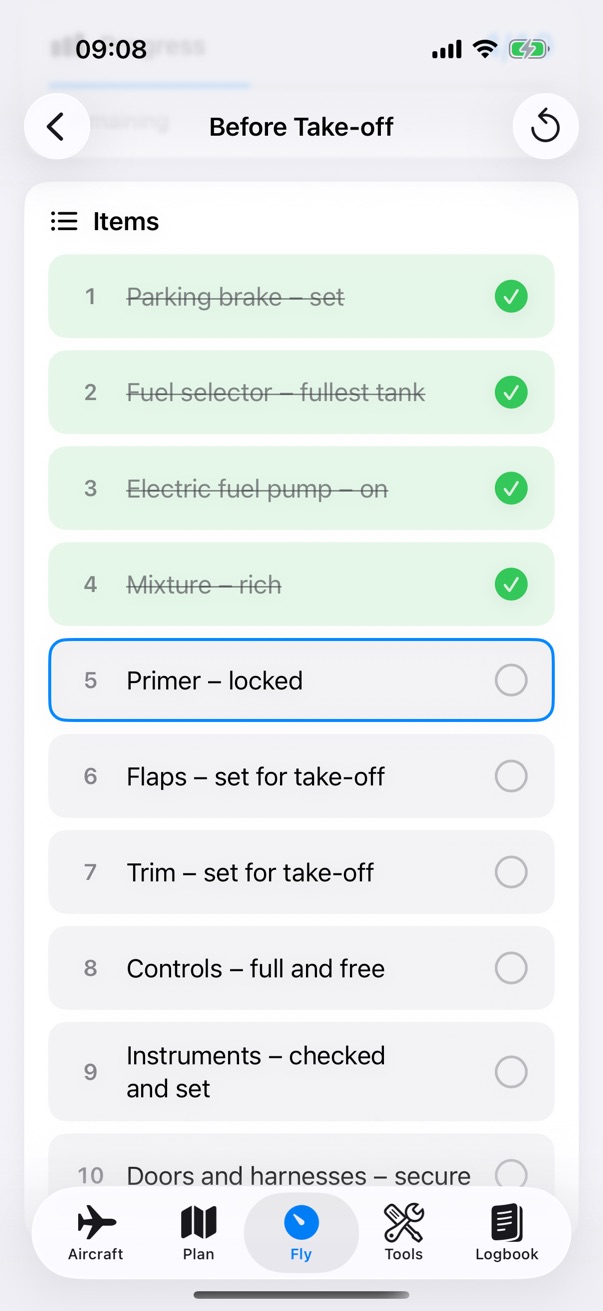
- Run them in the Fly tab, ticking off each item as you go.
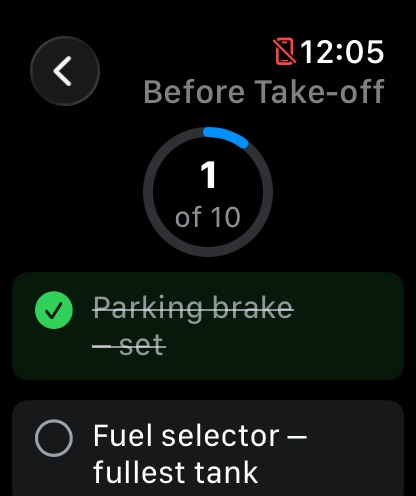
- They're on your Apple Watch too, sent from your iPhone.
How it works
Step by step: a checklist
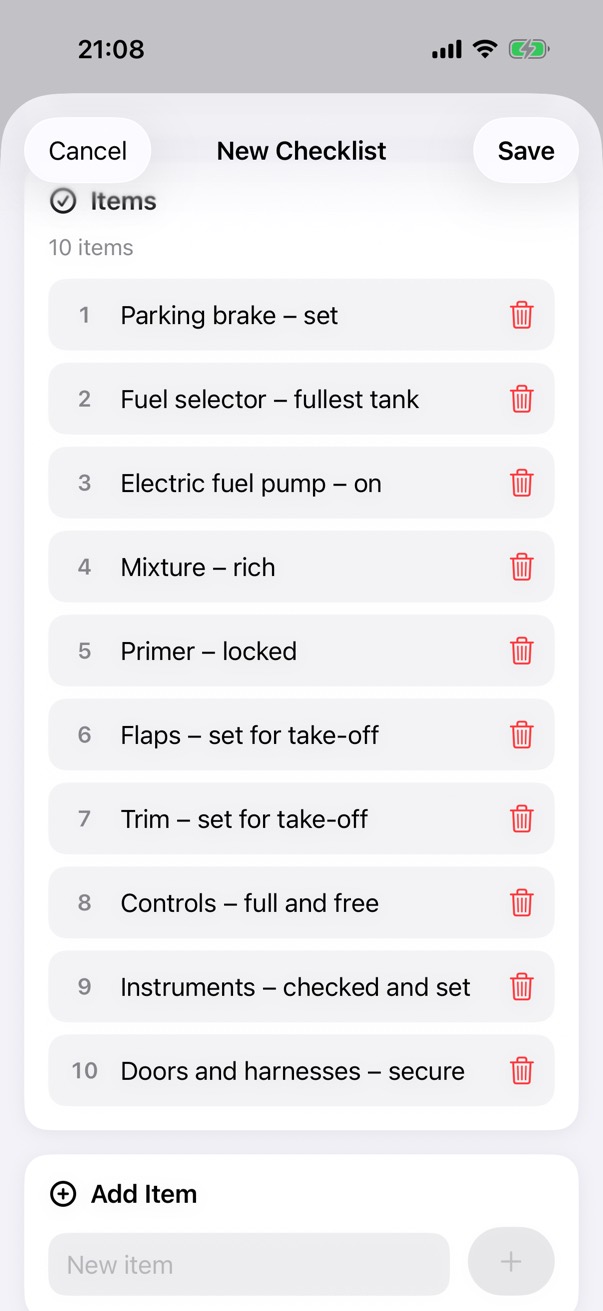
Step 1 of 3
Write it
Add a checklist to the aircraft and type in its items, in the POH's order.
Step 2 of 3
Run it
In the Fly tab, open the checklist and tick off each item as you go.
Step 3 of 3
On your wrist
The same checklist on your Apple Watch, ticked off there too.